
How To Import Presets into Lightroom Mobile
How To Import Presets into Lightroom Mobile
A detailed, step by step guide to help you import Lightroom Presets you’ve purchased into the free Lightroom Mobile app.
If you have the free version of Lightroom Mobile on your phone, importing presets requires a little bit of effort to get set up. Don’t let this deter you from purchasing Lightroom presets! My step by step guide offers detailed, easy to follow instructions complete with screenshots and highlights so you can see exactly what to do!
Please note that this guide is for iPhone, and some steps may look slightly different depending on your model (all screenshots were taken on an iPhone 8). If the button you’re looking for isn’t in the same spot as the guide says it should be, check the four corners (top left of your screen, top right, bottom right, or bottom left) for a similar icon as that is where they are generally placed.
If you’re using an Android device, this guide may still be helpful but you can also check out this video specifically for Lightroom on Android. If you’re looking for how to upload presets to Lightroom on a desktop computer, you can find my guide here!
Step 1 - Download the Unzip App
If you’ve already downloaded the free Lightroom app and purchased some cool preset filters, the next step is to download an app that will allow you to easily unzip attachments from your e-mail to your phone. In Colour Presets (and most Lightroom mobile presets) are delivered as DNG files in a zipped folder via e-mail.
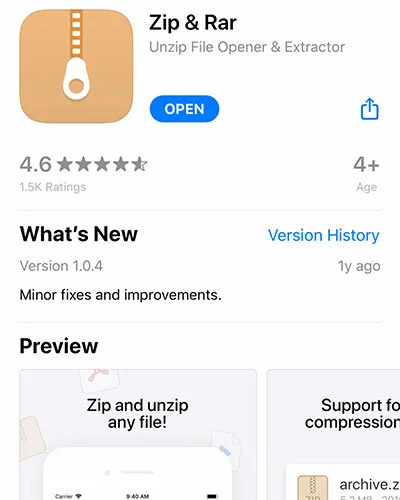
I recommend downloading the Zip & Rar app (it will save as Zip & Unzip on your phone), and trust me on this one because I tested out 5 different zip apps on my iPhone, and this one was the easiest to use, supported the DNG file type, AND, bonus, it’s aesthetically pleasing!
Step 2 - Open the Zip File in Your E-mail
Once you’ve downloaded the app, open up the e-mail with your Lightroom preset purchase, and tap on the link. Select which browser you’d like to open it with. The screenshot shows the zip file in Safari.

Step 4 - Unzip Your Presets in the Unzip App
Tap ‘Open in “Zip & Unzip”. The zip file will automatically open in the Unzip app. Tap the “Primary_In_Colour_Presets” folder and select ‘Unzip’ from the pop-up menu.


Once the file has unzipped, a new unzipped folder will pop up in your files. Tap that folder. You may see multiple folders here. Tap the one with your presets and DNG or Mobile as the title (see image, ex: The Primary Collection Mobile). DNG files are for mobile, XMP for desktop, and In Colour Presets also includes an informational PDF with How To Guides like this one.

Once you open the mobile folder with .dng files you’ll see the list of presets in the preset pack you purchased. Tap ‘Select’ in the upper right corner and tap each preset file to select it. Once you’ve selected all the presets, tap the ‘Save to’ icon in the lower left corner.


Step 5 - Save Presets to Camera Roll
Once again swipe up to see more options on the pop up screen and then tap ‘Save (Number) Images’.

You can then exit the Zip & Unzip app and open your Lightroom app.
Step 6 - Import Presets into Lightroom
In Lightroom select ‘All Photos’ in the Library tab. If this is your first time using Lightroom and you haven’t imported any images yet, make sure you have at least one photo imported first. To import images tap the 3 white dots in the upper right corner and select add photos > from camera roll.

Your camera roll will pop up, and you should see a black or gray box ‘image’ for each preset you saved. Tap and hold to select each preset, and make sure to import at least one regular image as well, if you haven’t previously. Tip: Tap, hold, and slide your finger across each ‘image’ to select multiple files faster.


Once you’ve selected all preset ‘images’ tap ‘Add’ and all the files will be imported into your Lightroom Library. Every brand is different, but my In Colour Presets will show up in your Lightroom Library as a rainbow gradient with the title of each preset in text.

Step 7 - Save Presets into Preset Group Folder
You’re almost there! Now you’ll need to manually save each preset to a preset list within Lightroom. Tap on the first preset ‘image’ (pictured here is my Matcha preset). Don’t worry if the image looks blurry or grainy; these files are purposefully low resolution to save space and this will not effect the preset.

Once you’ve tapped on the first ‘image’ swipe left on the menu on the bottom of your screen. You will see an icon labeled ‘Presets’ (circled in red below). Tap the icon to open your preset lists. If this is your first time importing a preset collection, you will likely see the generic presets that come with Lightroom, like ‘Color’, ‘B&W’, etc. You can ignore these for now.

Next, tap the 3 dots in a white circle icon in the top right corner and select ‘Create Preset’. (Note: You can select this icon and click ‘Create Presets’ from any tab on your bottom menu (light, color, etc.). You don’t have to be in the Presets tab specifically. However, if you’re new to Lightroom I think this is a great way to get to know the presets tab and see where your presets will live.)

A new menu page will pop up. I recommend you create a new Preset Group. That way you can save different preset collections and stay organized. If you choose not to create a new preset group, your presets will be automatically saved in ‘User Presets’.

To create a new preset group, tap the arrow next to ‘User Presets’ under ‘Preset Group’. Then select ‘Create New Preset Group’ at the bottom of the pop-up. Name your preset collection (I recommend naming your groups after the brand name, i'.'e In Colour Presets) then hit ‘Done’.

Back on the ‘New Preset’ menu page, name your preset in the text box at the top. I recommend keeping the name that the creator has given the preset, so if you see a photo on their social media that you like, you’ll know which preset they used. In Colour Presets are all named on the image you’ll see in Lightroom to help make this process easier!

Once you’ve named your preset and selected or created a new preset group for it, tap the check mark in the upper right corner. (Remember, it may appear in a different corner of your screen.)
That preset can now be found in the preset group you created for it! Tap the X in the lower left corner to go back to the preset file you just saved, and then the left pointing arrow in the top left corner to go back to ‘All Photos’.
Repeat this process with each individual preset ‘image’ that you imported until all are saved in your new preset group. (You may need to select your new preset group each time you save and name the next preset.)
Step 8 - Apply Your New Presets to Your Photos!
Now for the fun part! Tap any image in your Lightroom Library to open it. Swipe left along the bottom menu until you see the ‘Presets’ icon. Tap the icon to open your presets!
If your new preset group doesn’t show up, tap the down pointing arrow next to the group name to see all preset groups. You can swipe up on this menu to see more. Select the group you want to use, and then tap each preset to preview it on the photo you selected.
You can tap through each preset to see how it will look on that image, and when you decide on the best one, click the check mark in the lower right corner to apply it!

Now you’ll be able to apply any preset to any image with the tap of a button. Don’t forget: Lightroom Presets are customizable too! Explore each tab on the bottom menu, particularly the ‘Light’ and ‘Color’ tabs. If you need to brighten or darken a photo you can do so easily with the ‘Exposure’ slider in the ‘Light’ tab. If you want to make an image cooler or warmer, you can do that with the blue/yellow and green/magenta sliders in the ‘Color’ tab.
Remember that every image is different! Most presets will look great on a variety of different images, but some may need to be adjusted slightly to fit your unique photo. Looking for how to import presets on Lightroom desktop? See my guide here. I also have a great guide on how to get the most out of your Lightroom presets. Have fun and feel free to DM me on Instagram if you have any other questions about Lightroom presets!
